![[object Object]](https://umsousercontent.com/lib_CUsguFEVafmoKCKW/ns6hm1s6vu8ctynd.png?w=334)
Efabless is committed to simplifying the process of smart product creation and making it available to everyone. The world is quickly advancing towards a trillion connected devices and in the process, forces are driving application developers towards creating custom silicon in order to attain or maintain their competitive advantage. Those forces include the need to:
- Control the most critical parts in your supply chain
- Simplify part sourcing and reduce BOM complexity to increase margins
- Reduce a product’s power and / our physical footprint to drive differentiation
- Protect your intellectual property to safeguard your competitive advantage from copycats
In part one of this series, we discussed the common misconceptions around creating custom SoCs. For example, using ARM’s DesignStart on a platform such as Efabless, designing a custom SoC is remarkably simple an inexpensive. We showed how using Efabless design templates companies can quickly create a custom SoC configuration; if you know how to lay out a PCB, you will be able to create a custom chip! That configuration can then be submitted as a request for a turn-key service to realize a custom part for as little as $70k, or a designer can complete the design themselves leveraging design tools and fabrication services available through the platform.
The general process of going from idea to tape-out looks like this:
- Select an SoC design template based on your application
- Configure the SoC using a library of pre-integrated IP
- Create a project based on the configuration and generate the top-level design
- Verify the base design through test benches and simulation
- Optional — modify and re-verify the design to add custom logic, verification, etc.
- Optional — Prototype your solution using an evaluation board or FPGA
- Complete the physical design, tape-out, package and test
Part 1 of this series covered selecting an SoC template based on your application and configuring it using a library of pre-integrated IP. This article moves you ahead to creating a project based on your configuration, generating a top-level design and then verifying the base design through test benches and simulation. Let’s get started.
From Template to Project

Overview of template configuration flow
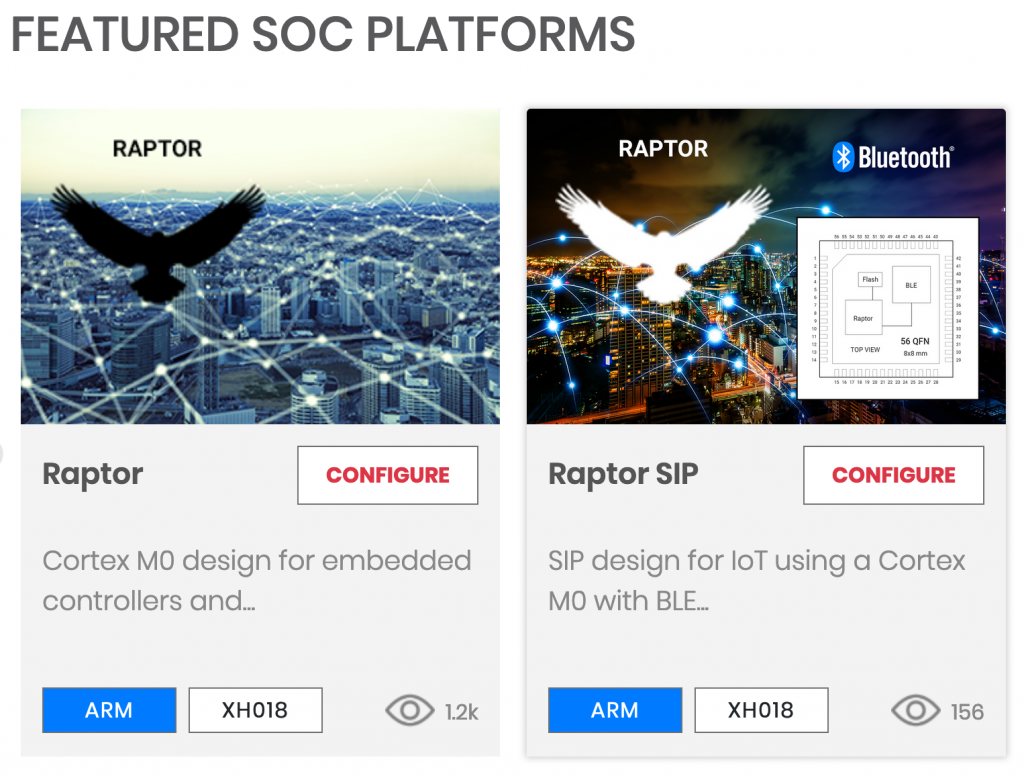
In order to walk through the steps of this article, it is first necessary to have an Efabless account. If you have not already done so, sign up and then log in to your account. Our starting point for what follows is the Efabless home page. We start by going to the featured SoC platform section and clicking on the configure button of the Raptor Arm Cortex-M0 template.
The process of configuring your SoC template now beings. If you did not read part 1 of this series, you can go read that now to get the details of configuring your template. When you have finished your configuration click the save button and you are taken to your SoC configuration page.
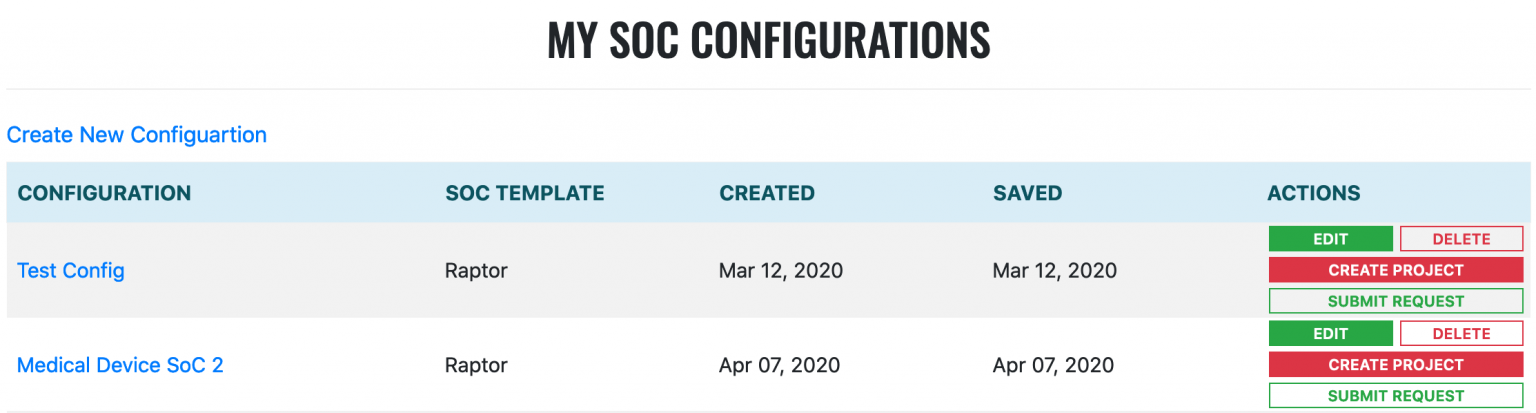
The Efabless dashboard
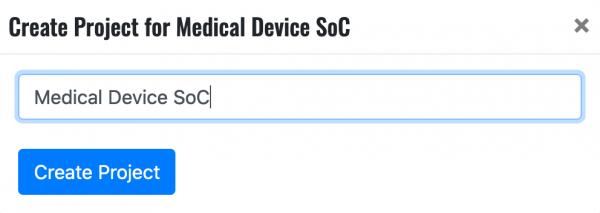
Now, let’s turn our template into a project we can continue to customize. I am selecting the medical device SoC in this example and when I click the ‘Create Project’ button I’m prompted for the name I’d like to assign to this project. Give your project a name, click the create project button.
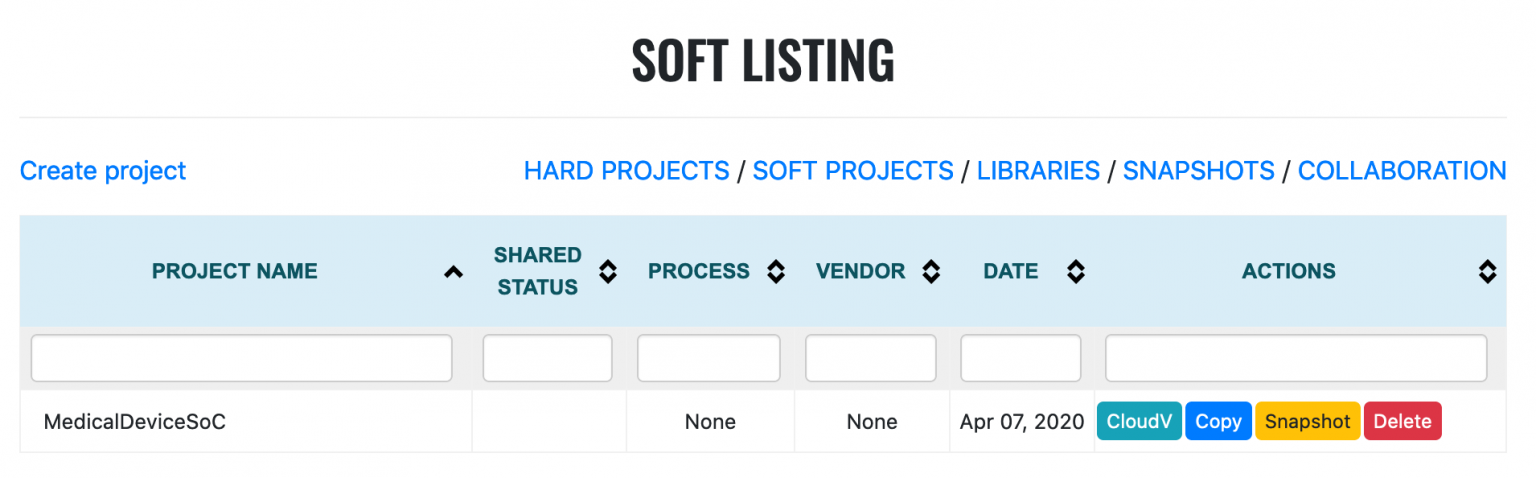
You are now taken to the listing of soft projects associated with your account. Soft projects are electronic designs generally consisting of synthesizable RTL models such as a top-level design for an SoC. In the table of projects, you’ll see your newly created project. In the actions column, notice the CloudV button. CloudV is a web-based environment for digital design and is the tool Efabless uses for web-based SoC configuration, validation, simulation and even synthesis. Click on the CloudV button to launch your project in CloudV.
Overview of CloudV
CloudV’s interface has all the familiar elements of an integrated development environment. In the center is the main content view where we’ll soon take a look at the IP blocks of our SoC. It also loads files for editing verilog, source code in C and other text files. The bottom panel of the interface is where errors and warnings appear, and the right hand side of the interface is the general project explorer.
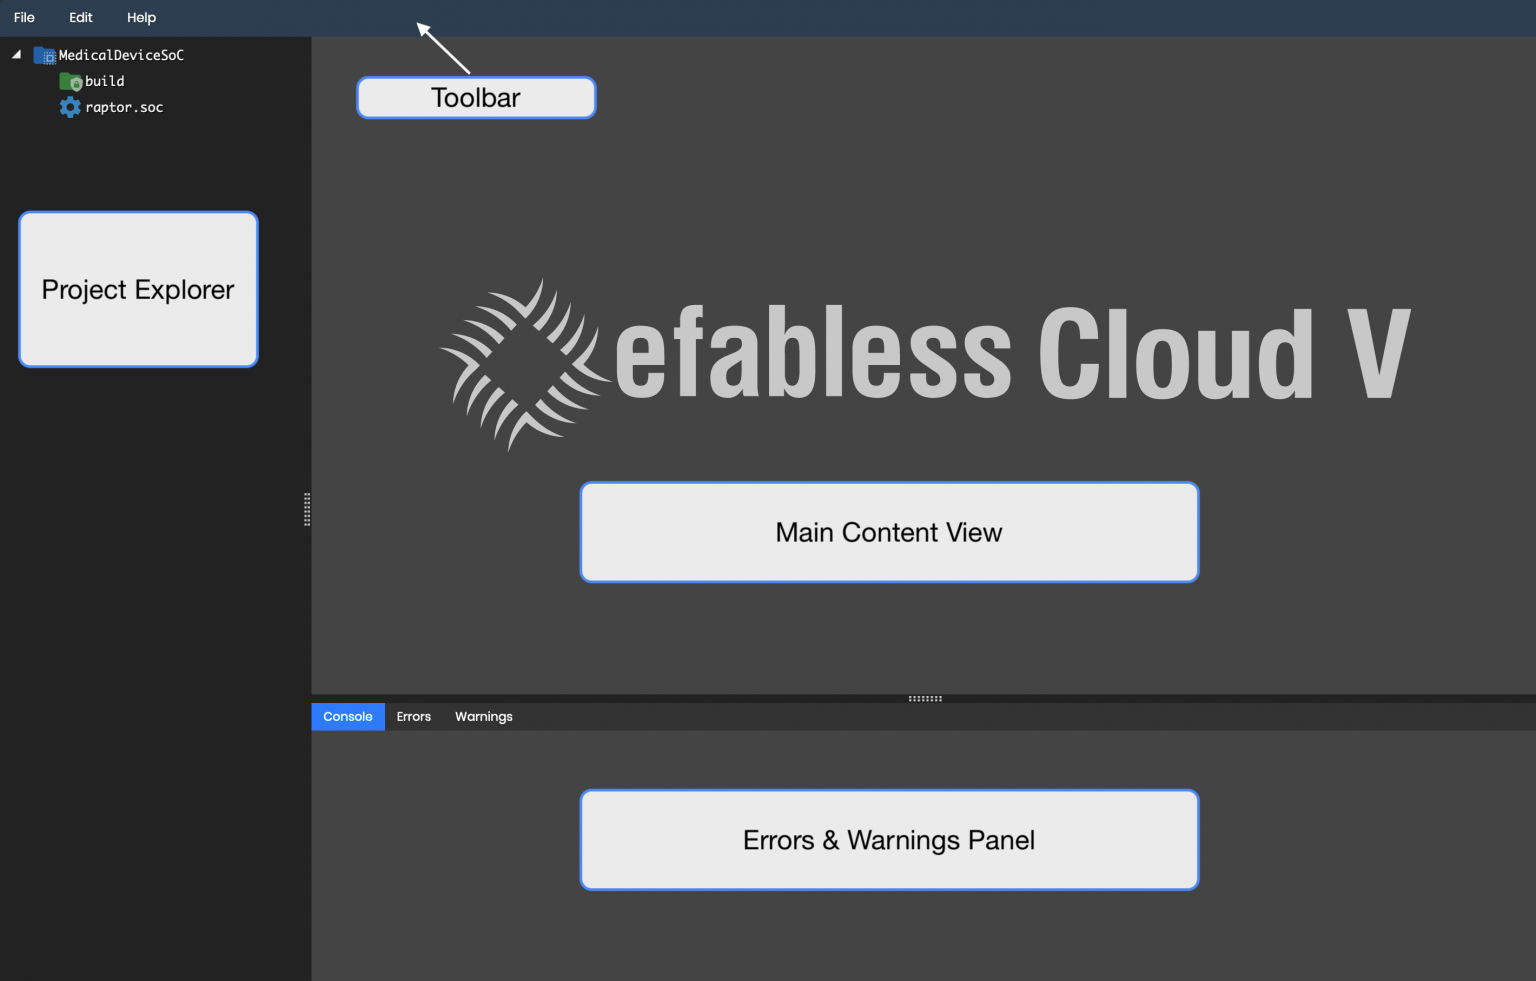
The CouldV interface
Reviewing your SoC Configuration
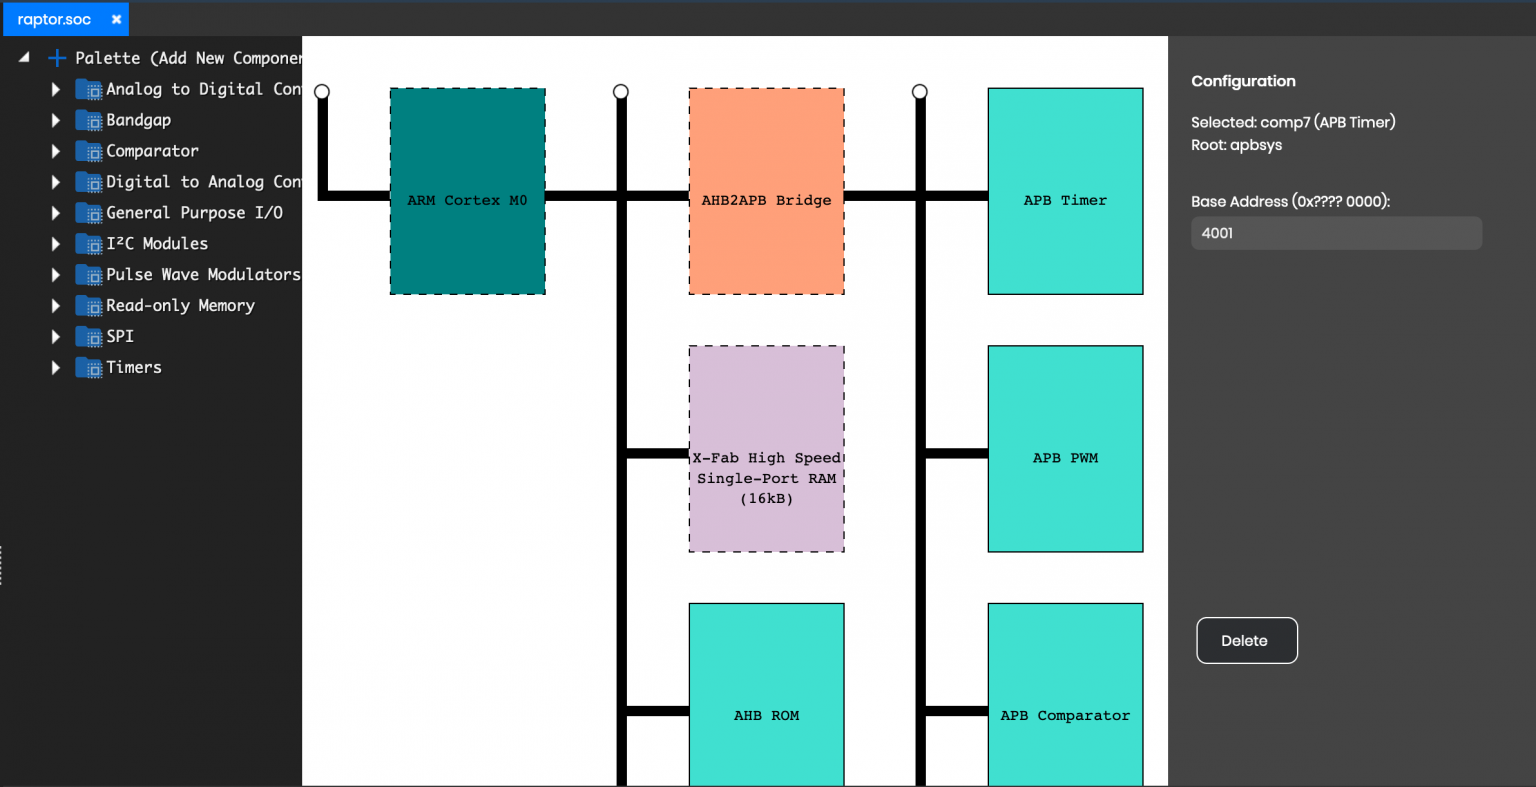
Let’s now review your SoC configuration. In a later article, we’ll detail how you can modify and further configure the IP blocks of the design you defined in your template. For now, in the project explorer, double click on the ‘raptor.soc’ file and the main content view now holds a tab called ‘raptor.soc’. The central part of the view shows the IP blocks that are part of your design. You can scroll around and see that every peripheral you specified in the template now has a representation in this model.
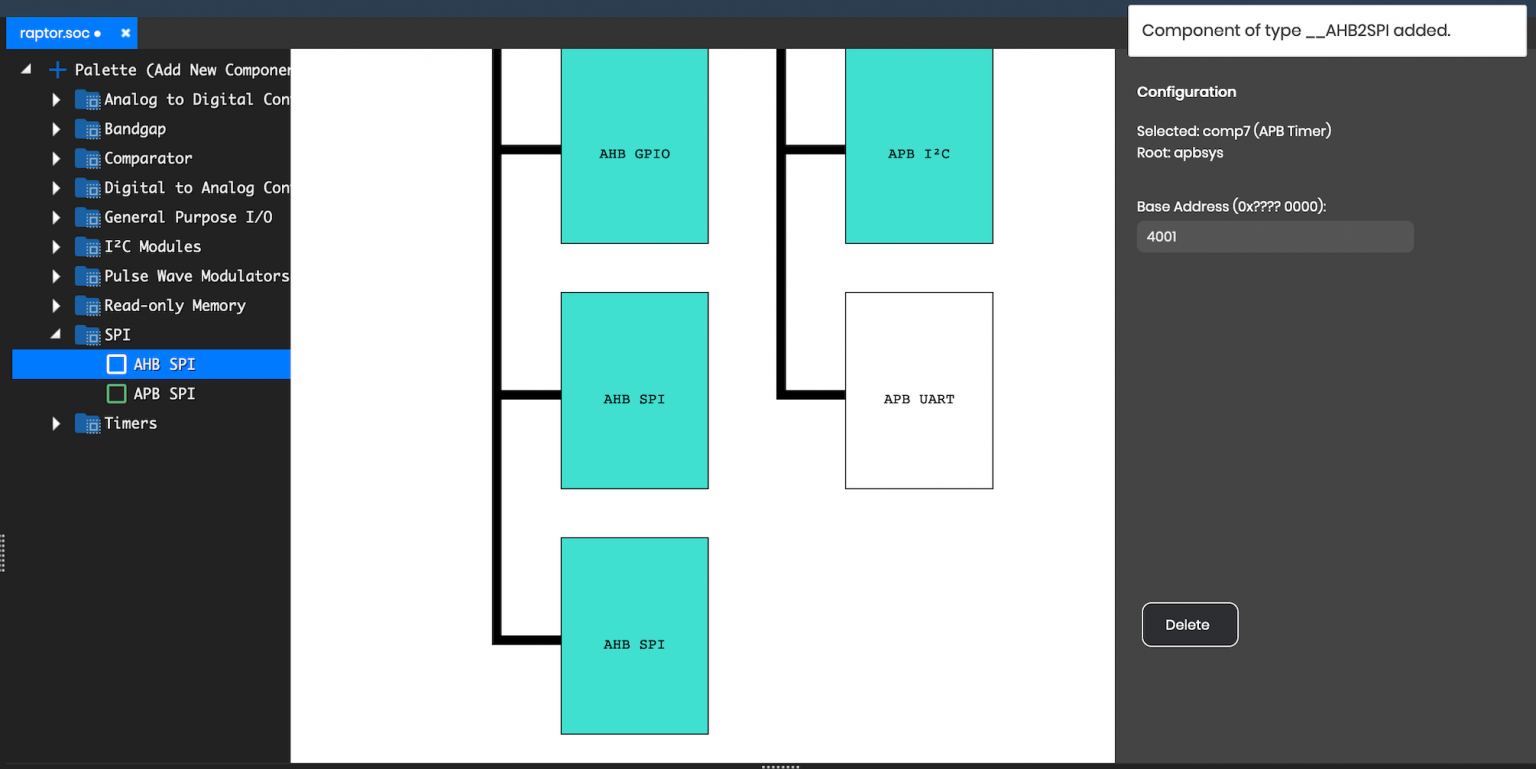
In case you were curious, the left-hand side of the view is a palette of additional IP blocks that you can integrate into your application. For example, if your application required an additional SPI interface connected to the AHB bus, all you have to do is double click on the element in the palette and it is added to your design. This SoC editor presents everything you need to add, remove, and configure IP blocks for your design at a high level. Let’s move on now to generating the assets for this design.
Generating the Design
Once you have finished defining and configuring your SoC, save it either though the File/Save menu or via Control/Command-S. Save your design now.
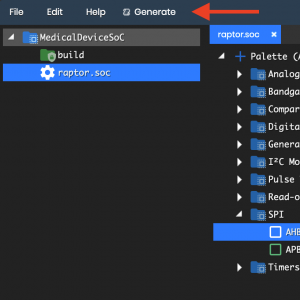
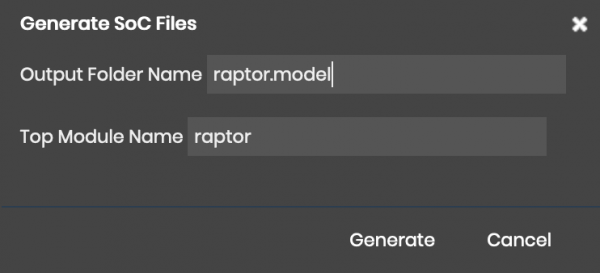
When CloudV has an SoC file open, a ‘generate’ button appears in the toolbar. Press the button and a window will appear where you can specify the output folder name and the top level module for the generated design. Leave the defaults that are presented press ‘generate’ and a background process will be initiated.
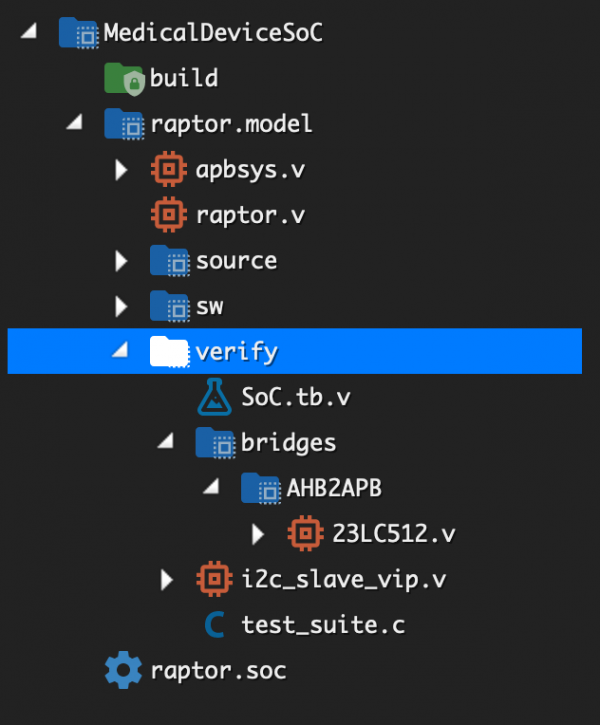
When the generation of the project completes, a folder named raptor.model is added to the project explorer. Inside that folder is the entire scaffolding for your design and includes verilog hdl files inside the source directory, c source code drivers, startup scripts and linker files inside the sw directory, and test benches and test code inside the verify directory. For the remainder of this article, we’ll work with the files inside the verify directory to show you how to simulate code running on your SoC design.
Compiling Code
Part of the design generation process includes the generation of basic device drivers for all the peripherals included in your SoC. This code can be used to start your firmware development as it can be compiled and run on your physical part once it is produced. Using the Efabless tools, before your part is produced, you can simulate code you write. Open up the file named test_suite.c inside the verify folder.
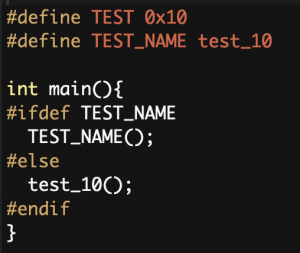
#defines to select the test to compile
A quick look at this generated file which show you that all the drivers for your part’s peripherals have been imported and a number of tests created to verify their proper functioning. Let’s compile a test and simulate it. The # define lines shown at the top of the file can be modified to select which test is run. After making this change, save the file and click compile in the toolbar. A window appears to configure a few aspects of the compilation.
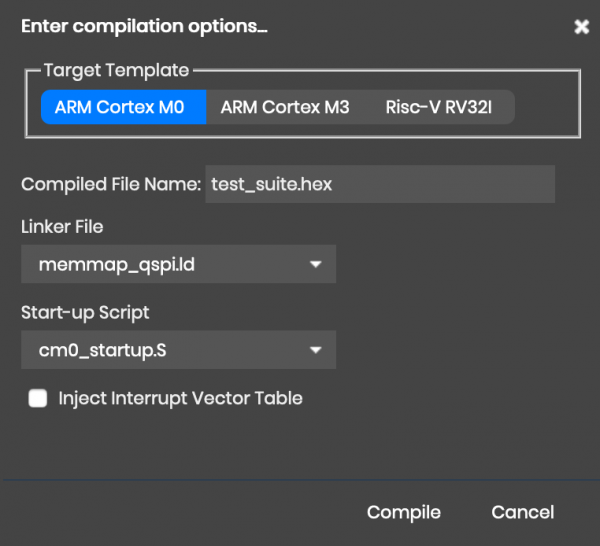
Since our SoC has a Cortex M0 Core, that is pre-selected. You can modify the name of the generated hex file if you need to, but for now, leave this as is. Depending on your development setup you may need to use different linker map files or start-up scripts and the window provides you the option to do that. In our case, leave everything set to its default setting and press ‘Compile’. Upon successful compilation, two files, test_suite.hex and test_suite.lst file, are added to the project and visible in the project explorer.
Simulation of your SoC
Now that we have compiled a program, let’s look at how we can simulate it and investigate the simulation results. Open up the test bench file named SoC.tb.v located in the ‘verify’ directory. This test bench runs a series of tests that exercise the SoC’s peripherals. Notice on the toolbar there is an option to ‘simulate’.

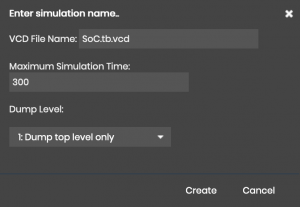
Click the ‘simulate’ button and in the screen that appears, you have the option to specify the maximum time period for the simulation. I’ve selected to run the simulation for a maximum time period = 300.
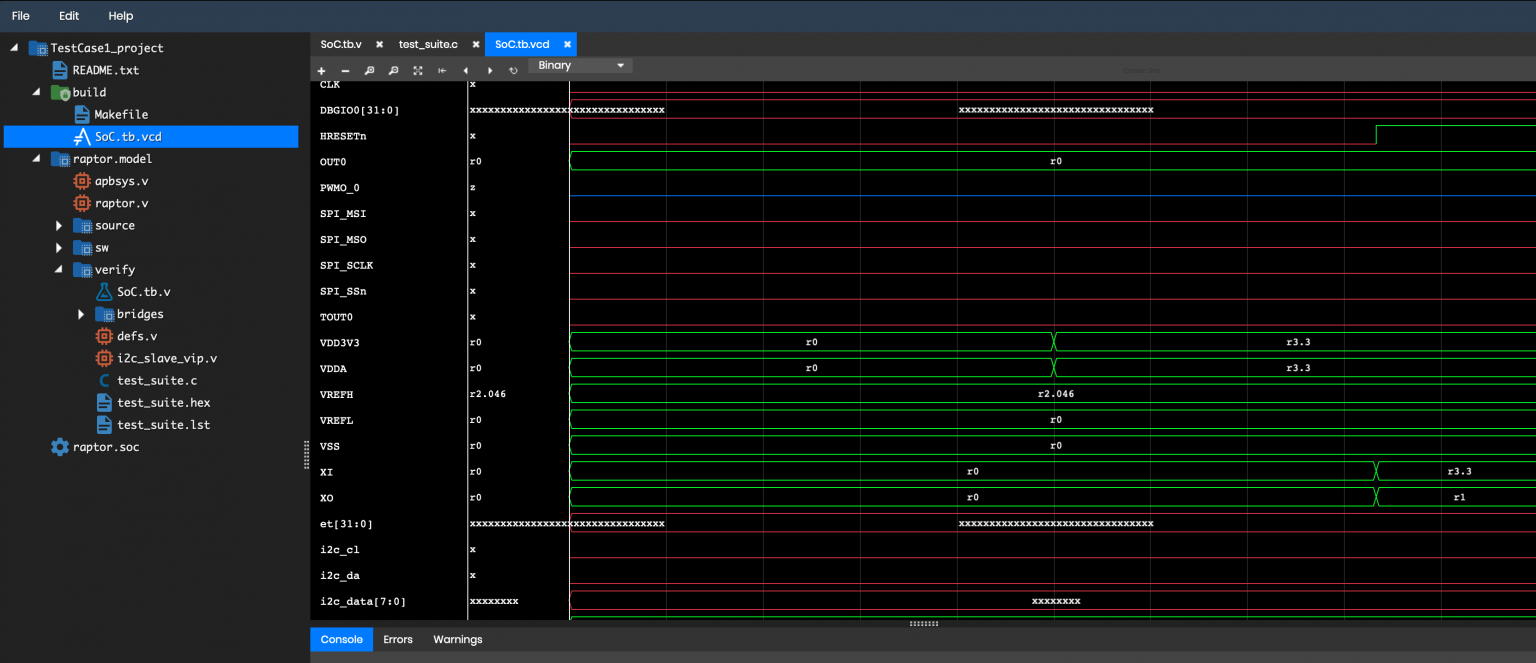
When the simulation completes, a file named SoC.tb.vcd appears in the ‘build’ directory. These are our simulation results. Double click the file and the result open up in our simulator. What you see is a complete visualization of the device signals as it was running the test code we previously compiled.
Summary
The semiconductor industry as a whole is seeing growth in demand for custom SoCs. The forces driving this growth range from needing better control of the supply chain of product’s critical components, simplifying supply chain complexity and decreasing BOM costs, reducing power consumption or product footprint, and finally, protecting intellectual property to maintain a competitive advantage. Efabless, through its SoC template methodology, in conjunction with its community and manufacturing partners make the process of going from idea to custom part extremely easy and cost-effective. In this article we showed how a designer can turn their SoC template into a project and the fundamentals of CloudV, the Efabless cloud-based digital design tool. Validating a design, compiling code and simulating functionality is all supported and easily done using Efabless tools. In a future article, we’ll show you how you can modify your template configuration, simulate different code, and how to navigate the physical design flow using OpenGalaxy, a web-based physical design tool. The benefits of SoC creation for companies of all sizes, even those with low volumes, abound and with the Efabless platform, designing a custom SoC for your application is easier and cheaper than ever before. Start now.